Appearance
TLS onboarding (owner verification)
Device tokens can carry an owner verification mode (OVMode) — an extra security layer on top of the auto-join token. With OVMode set to TLS, a device that provisions itself with the token is not trusted just for knowing the token: it must also prove, over a mutual-TLS connection, that it holds a private key belonging to a certificate chain you registered up front (the root of trust). Until it does, the device is marked as ownership_unverified and its API access is restricted.
This protects against the main weakness of plain token provisioning: an auto-join token is a shared secret baked into images at the factory, so it can leak. With TLS verification enabled, a leaked token alone is not enough to onboard a rogue device into your account.
The protocol
The whole flow at a glance — the owner registers a trust anchor once, then every device proves itself against it on first boot:
1. Owner registers a root of trust
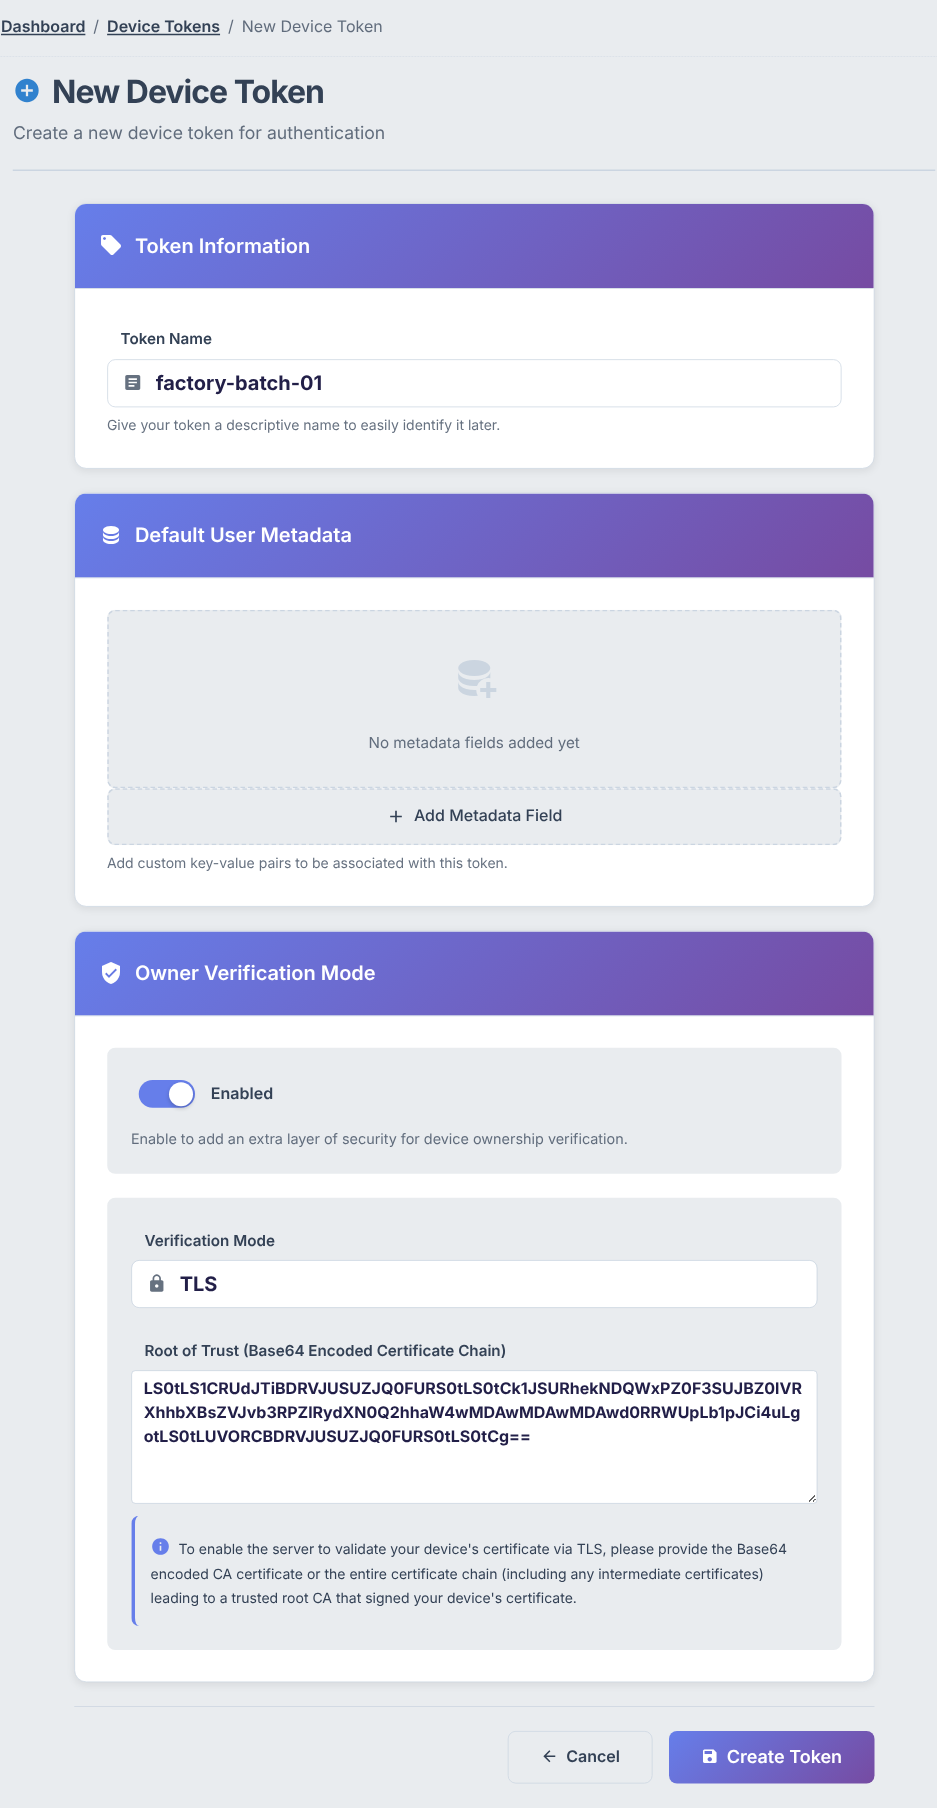
When creating a device token (/devices/tokens/new), enable Owner verification and select the TLS mode. Paste your certificate chain, Base64 encoded, as the root of trust. The chain is stored with the token; every device joining through this token inherits an ovmode extension referencing it.
Other modes exist (claim, manual, default) — this page covers tls. For where TLS verification sits among the onboarding routes, see How onboarding works.
2. Device provisions with the token
The device registers on first boot using the token (Pantahub-Devices-Auto-Token-V1 header, see Auto-join tokens). It is auto-assigned to your account as usual, but because the token has OVMode enabled, the device record carries ownership_unverified: true and a pending verification status.
3. Device logs in — with restricted access
The device authenticates against /auth/login with its device identity (prn:::devices:/<device-id>) and the creds.secret Pantavisor stored during registration. The token issued before verification is short-lived and deliberately scoped down: the only call it permits is the ownership validation endpoint. Any other API call fails, and the device stays in a "syncing" state until verification succeeds.
4. Device proves key possession over mutual TLS
The device calls the validation endpoint,
/devices/{device-id}/ownership/validatepresenting its client certificate and private key as the TLS client identity (plus the restricted bearer token from step 3). The server validates the presented certificate against the token's root of trust.
5. Verification completes
On success the response reports status: completed and the device's ownership_unverified flag is cleared. The device simply authenticates again at /auth/login — this time it receives a normal token with full access, and from here on it operates like any other device. Nothing else is required by the protocol; anything beyond the re-login (recording state locally, rebooting) is up to the device's own software.
Security properties
- Two independent factors. Onboarding requires both the auto-join token and possession of a private key chained to your root of trust. Leaking either one alone is not sufficient.
- Short-lived, restricted pre-verification token. Until validation succeeds, the device only ever holds a short-lived token that can reach nothing but the validation endpoint, so an unverified device cannot read or write anything else in your account.
- Owner-controlled trust anchor. You choose and upload the certificate chain; Pantahub never sees the device's private key — it only verifies the TLS handshake against the chain.
- Keep the private key in hardware. The device's private key should be generated inside — and never leave — a hardware-backed keystore. Common options are a TPM 2.0 (discrete chip or firmware TPM such as Intel PTT or AMD fTPM), a secure element like the Microchip ATECC608 or NXP EdgeLock SE050, an SoC keystore behind Arm TrustZone/OP-TEE, or SoC crypto units such as NXP CAAM on i.MX. Exposed through PKCS#11 (e.g.
tpm2-pkcs11) or an OpenSSL provider, the TLS stack performs the handshake while the key stays in hardware. If none of that is available, at minimum keep file-based keys on a Pantavisor encrypted disk — and never commit real keys to a repository. Rotating means issuing a new chain, updating the token's root of trust, and rolling new keys to devices.
Storing the key on an encrypted disk
When the TLS stack needs the key as a file (as the example container does), Pantavisor's disks feature can provide an encrypted dm-crypt volume whose encryption key is itself sealed by hardware. Disks are declared in the device state's device.json and come in several types:
dm-crypt-caam— the volume key is protected by the NXP CAAM crypto module. Withmode: mainlineit uses the Linux trusted-key subsystem, so the plaintext key never leaves the kernel;mode: nxpuses NXP's tagged key blobs.dm-crypt-dcp— same idea for NXP DCP platforms (i.MX6ULL class), also withnxpandmainlinemodes.dm-crypt-versatile— software-only fallback with a plaintext key file. It protects the data at rest (e.g. against copying the storage offline) but not against an attacker with root on the device — prefer the hardware-backed types where the silicon supports them.
A minimal setup: declare the disk once,
json
{
    "disks": [
        {
            "name": "dm-secrets",
            "type": "dm-crypt-caam",
            "mode": "mainline",
            "path": "-v2 /storage/dm-crypt-files/secrets/caam.img,2,key"
        }
    ]
}
then have the onboarding container mount its key directory from that disk via the storage section of its run.json:
json
"storage": {
    "pv-tlsownership--var-tlsownership": {
        "disk": "dm-secrets",
        "persistence": "permanent"
    }
}
Pantavisor creates, formats and mounts the encrypted volume on demand the first time it is referenced, so /var/tlsownership — where the container expects cert.pem and key.pem — lives on encrypted storage from the first boot. See the Pantavisor disks documentation for the full type reference, dual-disk key migration, and mount recovery details.
Example container: pv-tlsownership
pv-tlsownership is a small Alpine-based Pantavisor container (curl + jq + one shell script) that runs the device side of this protocol. On startup it:
- Checks the
ovmode_statusdevice-meta key via thepv-ctrlsocket — if alreadycompleted, it just idles. - Reads the device ID from
/pantavisor/device-idand the API host from/pantavisor/pantahub-host, and pullscreds.secretfrom the Pantavisor config (retrying until Pantavisor has populated them). - Logs in at
/auth/loginas the device to obtain the restricted token. - Calls
/devices/<id>/ownership/validatewith--cert/--key, i.e. as a TLS client using your certificate and key. - On
status: completed, setsovmode_status=completedin device-meta and reboots the device.
Note that step 5 is this container's own bookkeeping, not part of the protocol: the device-meta flag lets the script skip validation on later boots, and the reboot restarts the stack cleanly in the verified state. Protocol-wise all that's needed after validation is to log in again for a full-access token.
Also, the container reads the certificate and key from plain files for simplicity. In production the private key should live in a hardware keystore (TPM 2.0, secure element, TrustZone/OP-TEE — see Security properties) and be reached through PKCS#11 rather than shipped as a file — or, at minimum, the key files should sit on a Pantavisor encrypted disk.
Configuration
The script reads its inputs from these locations (overridable via flags or environment):
| Setting | Default | Override |
|---|---|---|
| Client certificate | /var/tlsownership/cert.pem | -c / CERT_PATH |
| Private key | /var/tlsownership/key.pem | -k / KEY_PATH |
| Device ID file | /pantavisor/device-id | -d |
| Pantahub host file | /pantavisor/pantahub-host | -p |
| pv-ctrl socket | /pantavisor/pv-ctrl | -s |
Using it on your devices
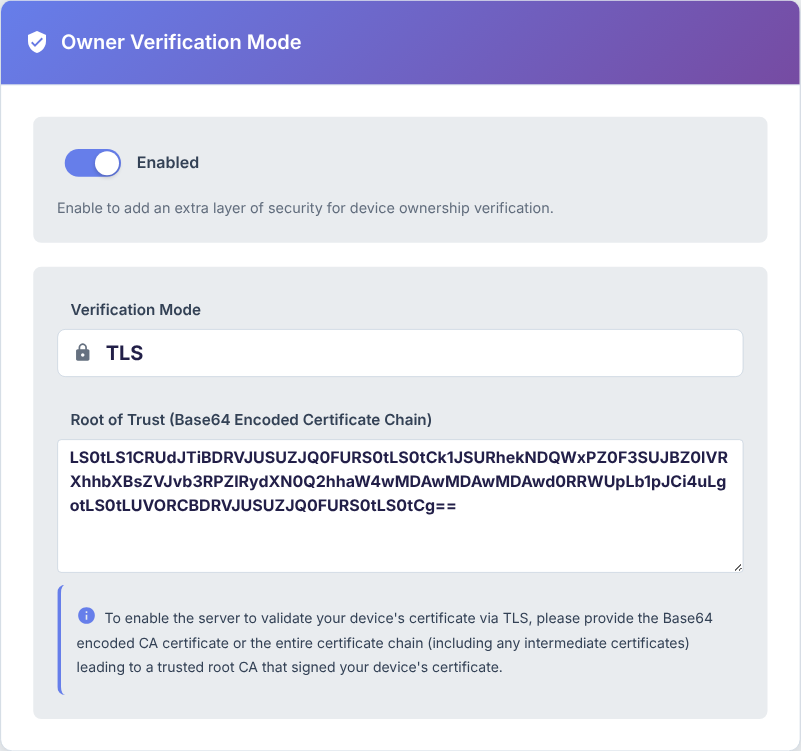
Create a device token with owner verification mode TLS and your Base64-encoded chain as root of trust (see Tokens):
Add the
pv-tlsownershipcontainer to your device state. Prebuilt Pantavisor packages exist foramd64,arm32v6,arm32v7andarm64v8; replace the placeholdercert.pemandkey.pemunder the package's_config/pv-tlsownership/var/tlsownership/with the certificate and key matching the chain you registered on the token.Provision the device with the token and boot it. The container performs the validation on first boot and reboots the device once verified; from then on the device operates with full access.
Devices that fail validation stay visible in your registry but remain unverified and restricted — a useful signal that a token may be circulating outside your factory flow.